
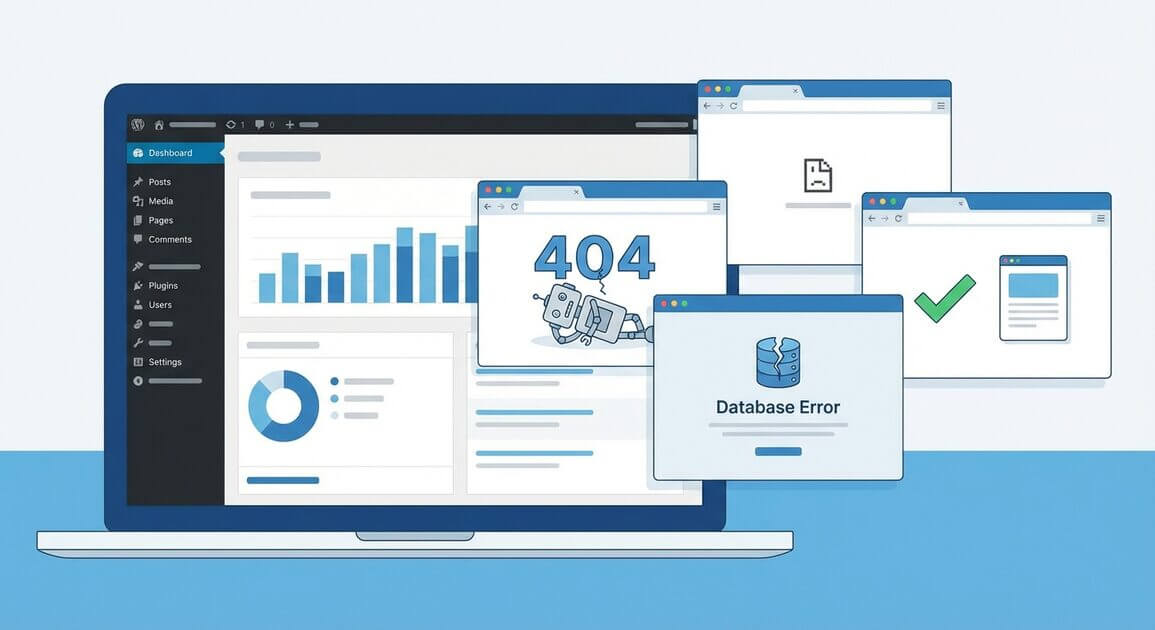
You finished migrating your WordPress site. You open the URL in your browser and something is broken. Maybe you see a white screen. Maybe every page throws a 404 error. Maybe images are missing, logins redirect in a loop, or the entire site loads at a crawl.
These are not rare edge cases. They are the most common WordPress migration problems, and almost all of them have straightforward fixes once you know where to look.
This guide covers the 15 migration errors you are most likely to encounter, explains why each one happens, and walks you through the exact steps to fix it. Every solution includes the actual commands, code, and configuration changes you need.
If you are still in the planning stage, using a migration plugin like All-in-One WP Migration can help you avoid many of these issues entirely. It handles database serialization, URL replacement, and file transfers automatically. But if something does go wrong, this guide has you covered.
1. White Screen of Death (WSOD)
What you see: A completely blank white page with no error message. The site loads nothing at all.
Why it happens: The white screen of death is almost always a PHP fatal error that WordPress cannot display. During migration, the most common causes are a PHP version mismatch between your old and new server, a plugin that is incompatible with the new environment, or a theme that references a function that does not exist in the new PHP version.
How to fix it:
Step 1: Enable debug mode. Connect to your new server via FTP or file manager, open wp-config.php, and add or update these lines before the “That’s all, stop editing” comment:
define('WP_DEBUG', true);
define('WP_DEBUG_LOG', true);
define('WP_DEBUG_DISPLAY', false);
This writes errors to wp-content/debug.log without showing them to visitors. Open that file after refreshing the page to see the exact error.
Step 2: Check PHP version. If the error log mentions an undefined function or a syntax error, your new server may be running a different PHP version. Log into your hosting control panel and check which PHP version is active. If your old server used PHP 7.4 and the new one uses PHP 8.2, functions like create_function() and each() that were removed in PHP 8.0 will cause fatal errors.
Step 3: Deactivate all plugins. If you cannot access the WordPress admin, rename the wp-content/plugins folder to plugins-disabled via FTP:
wp-content/plugins → wp-content/plugins-disabled
Refresh the site. If the white screen disappears, one of your plugins is the problem. Rename the folder back and then rename individual plugin folders one at a time to identify which one is causing the crash.
Step 4: Switch to a default theme. If disabling plugins does not help, rename your active theme folder in wp-content/themes/. WordPress will fall back to a default theme like Twenty Twenty-Four. If the site loads, your theme is the issue. Contact the theme developer or check for an update that supports your current PHP version.
2. “Error Establishing a Database Connection”
What you see: A plain white page with the message “Error establishing a database connection.”
Why it happens: WordPress cannot connect to the MySQL database. After migration, this typically means the database credentials in wp-config.php do not match the new server, the database was not imported correctly, or the database server hostname is different on the new host.
How to fix it:
Step 1: Verify credentials in wp-config.php. Open the file and check these four values:
define('DB_NAME', 'your_database_name');
define('DB_USER', 'your_database_user');
define('DB_PASSWORD', 'your_database_password');
define('DB_HOST', 'localhost');
On many shared hosts, DB_HOST is localhost. On some managed hosts (like Amazon RDS or certain cloud providers), it is a full hostname like db.example.com or an IP address. Check your hosting provider’s documentation.
Step 2: Test the connection manually. If you have SSH access, run:
mysql -u your_database_user -p -h localhost your_database_name
Enter the password when prompted. If this fails, the credentials are wrong. Create a new database user through your hosting control panel if needed.
Step 3: Check if the database was imported. Log into phpMyAdmin or use the MySQL command line and verify the tables exist:
SHOW TABLES;
If the database is empty, your import failed. Re-import the SQL dump file. If the tables have a different prefix (e.g., wp2_ instead of wp_), update the $table_prefix variable in wp-config.php:
$table_prefix = 'wp2_';
Step 4: Repair the database. Add this line to wp-config.php:
define('WP_ALLOW_REPAIR', true);
Then visit yoursite.com/wp-admin/maint/repair.php in your browser. Click “Repair Database.” Remove the line from wp-config.php when finished, as this page is accessible without authentication.
3. 404 Errors on All Pages (Except the Homepage)
What you see: The homepage loads correctly, but clicking any link or visiting any post or page returns a 404 error.
Why it happens: WordPress uses URL rewriting rules stored in the .htaccess file (on Apache) or the server configuration (on Nginx). After migration, these rules are often missing, corrupted, or incompatible with the new server configuration.
How to fix it:
Step 1: Resave permalinks. Go to Settings > Permalinks in the WordPress admin. Do not change anything. Simply click Save Changes. This regenerates the .htaccess rewrite rules.
Step 2: Check .htaccess manually. If resaving permalinks does not work, connect via FTP and open the .htaccess file in your site’s root directory. It should contain at minimum:
# BEGIN WordPress
<IfModule mod_rewrite.c>
RewriteEngine On
RewriteBase /
RewriteRule ^index\.php$ - [L]
RewriteCond %{REQUEST_FILENAME} !-f
RewriteCond %{REQUEST_FILENAME} !-d
RewriteRule . /index.php [L]
</IfModule>
# END WordPress
If the file is empty or missing, create it with these contents and set permissions to 644.
Step 3: Verify mod_rewrite is enabled. If you are on Apache and .htaccess looks correct but 404s persist, mod_rewrite may not be enabled on the new server. Contact your host or, if you have root access, enable it:
sudo a2enmod rewrite
sudo systemctl restart apache2
Step 4: Nginx configuration. If your new server runs Nginx instead of Apache, .htaccess files are ignored entirely. You need a try_files directive in your Nginx server block:
location / {
    try_files $uri $uri/ /index.php?$args;
}
Restart Nginx after making this change.
4. Broken Images and Missing Media
What you see: Pages load but images are broken. Thumbnails appear as empty boxes. The media library shows items but clicking them shows a 404 or a broken file path.
Why it happens: Image URLs stored in the database still point to your old domain or an old directory path. This happens when database URLs were not updated during migration, or when media files were not fully transferred.
How to fix it:
Step 1: Check if files exist. Navigate to wp-content/uploads/ on your new server. Verify that the image folders and files are present. If the uploads directory is empty or missing folders, your file transfer was incomplete. Re-upload the contents of wp-content/uploads/ from your backup.
Step 2: Update URLs in the database. If files exist but images are still broken, the database contains old URLs. The safest way to fix this is with WP-CLI:
wp search-replace 'https://oldsite.com' 'https://newsite.com' --skip-columns=guid --dry-run
Review the output. If it looks correct, run it again without --dry-run:
wp search-replace 'https://oldsite.com' 'https://newsite.com' --skip-columns=guid
The --skip-columns=guid flag is important. GUIDs are meant to be permanent identifiers and should not be changed, as this can cause issues with RSS readers showing duplicate content.
Why not use SQL REPLACE directly? A raw SQL query like UPDATE wp_posts SET post_content = REPLACE(post_content, 'oldsite.com', 'newsite.com') will break serialized data. See Error #12 below for details.
Step 3: Fix file permissions. If files exist and URLs are correct but images still do not load, check permissions. Directories should be 755 and files should be 644:
find wp-content/uploads -type d -exec chmod 755 {} \;
find wp-content/uploads -type f -exec chmod 644 {} \;
Step 4: Regenerate thumbnails. If images load on the front end but thumbnails are the wrong size, your new theme likely uses different image dimensions. Install the Regenerate Thumbnails plugin or use WP-CLI:
wp media regenerate --yes
5. Mixed Content Warnings (HTTP/HTTPS)
What you see: The browser shows a “Not Secure” warning even though you have an SSL certificate installed. Some resources (images, scripts, stylesheets) load over HTTP instead of HTTPS, creating a mixed content situation.
Why it happens: Your old site may have been on HTTP, or the database still contains http:// URLs from the old domain. Even if you installed an SSL certificate on the new server, WordPress will serve content using whatever URLs are stored in the database.
How to fix it:
Step 1: Force HTTPS in WordPress settings. Go to Settings > General and make sure both the “WordPress Address (URL)” and “Site Address (URL)” use https://. If you cannot access the admin panel, add these lines to wp-config.php:
define('WP_HOME', 'https://yoursite.com');
define('WP_SITEURL', 'https://yoursite.com');
Step 2: Update all URLs in the database. Run a search-replace to convert all HTTP references to HTTPS:
wp search-replace 'http://yoursite.com' 'https://yoursite.com' --skip-columns=guid
Step 3: Fix hardcoded URLs in your theme. Some themes hardcode http:// URLs in template files. Search your theme files for any remaining http:// references:
grep -r "http://yoursite.com" wp-content/themes/your-theme/
Update any matches to use https://.
Step 4: Add an HTTPS redirect. Ensure all HTTP requests are redirected to HTTPS. Add this to your .htaccess file (Apache):
RewriteEngine On
RewriteCond %{HTTPS} off
RewriteRule ^(.*)$ https://%{HTTP_HOST}%{REQUEST_URI} [L,R=301]
For Nginx, add this to your server block:
server {
    listen 80;
    server_name yoursite.com;
    return 301 https://$host$request_uri;
}
6. Login Redirect Loop
What you see: You enter your username and password on the WordPress login page, the page refreshes, and you are back at the login screen. No error message appears. You are stuck in an infinite login loop.
Why it happens: WordPress uses cookies to maintain your login session. After migration, the cookie domain or path may not match the new URL, or the site URL and WordPress URL in the database may be different, causing WordPress to repeatedly invalidate your session.
How to fix it:
Step 1: Clear browser cookies. Clear all cookies for your domain in your browser. This eliminates stale session data from the old site.
Step 2: Verify site URLs. Check that the WordPress Address and Site Address match. If you cannot access the admin, use WP-CLI:
wp option get siteurl
wp option get home
If they are different or incorrect, update them:
wp option update siteurl 'https://yoursite.com'
wp option update home 'https://yoursite.com'
Step 3: Force cookie settings. Add these lines to wp-config.php to reset the cookie domain:
define('COOKIE_DOMAIN', 'yoursite.com');
define('COOKIEPATH', '/');
Step 4: Check .htaccess for conflicting redirects. If your .htaccess file has multiple redirect rules (perhaps from a security plugin or caching plugin on the old server), they may conflict on the new server. Temporarily rename .htaccess to .htaccess-backup and create a fresh one with only the default WordPress rules (see Error #3 above).
Step 5: Deactivate plugins via database. If you still cannot log in, deactivate all plugins by running this SQL query:
UPDATE wp_options SET option_value = 'a:0:{}' WHERE option_name = 'active_plugins';
This sets the active plugins list to an empty array. Log in and reactivate plugins one by one.
7. Import Stuck or Frozen Progress Bar
What you see: You are importing a migration file and the progress bar stops moving. It may freeze at a specific percentage or sit at 100% without completing. The browser tab shows the page is still loading.
Why it happens: Large migration files can exceed the server’s PHP execution time or memory limits, causing the import process to be killed by the server before it finishes. The progress bar is browser-side and does not always reflect what is happening on the server.
How to fix it:
Step 1: Check if the import actually completed. If the progress bar is stuck at or near 100%, the import may have already finished but the browser failed to get the final response. Open your site in a new browser tab and check if the migrated content is there.
Step 2: Increase PHP limits. If the import genuinely failed, increase these PHP settings. You can do this in php.ini, .htaccess (Apache), or .user.ini depending on your host:
upload_max_filesize = 512M
post_max_size = 512M
max_execution_time = 600
max_input_time = 600
memory_limit = 512M
For Apache, you can add PHP values to .htaccess:
php_value upload_max_filesize 512M
php_value post_max_size 512M
php_value max_execution_time 600
php_value max_input_time 600
php_value memory_limit 512M
Step 3: Check disk space. Migration imports create temporary files. If your server runs out of disk space mid-import, the process will fail silently. Check available space:
df -h
Free up space by removing old backups, log files, or unused themes and plugins.
Step 4: Use the WP-CLI import method. If browser-based imports keep timing out, All-in-One WP Migration supports importing via the command line, which bypasses browser and web server timeout limits entirely:
wp ai1wm restore backup.wpress
This is the most reliable import method for large sites.
8. File Upload Size Limit Exceeded
What you see: When uploading a migration backup file, you get an error like “The uploaded file exceeds the upload_max_filesize directive in php.ini” or “Maximum upload file size: 2 MB.”
Why it happens: PHP and your web server have default upload size limits that are usually much smaller than a migration backup file. Many shared hosts set upload_max_filesize to just 2 MB or 32 MB by default.
How to fix it:
You need to increase the limit in your PHP configuration. The exact method depends on your hosting setup.
Method 1: .htaccess file (Apache with mod_php)
php_value upload_max_filesize 512M
php_value post_max_size 512M
Method 2: .user.ini file (Apache with PHP-FPM or Nginx)
Create or edit a .user.ini file in your WordPress root directory:
upload_max_filesize = 512M
post_max_size = 512M
Method 3: php.ini
If you have access to your server’s php.ini file:
upload_max_filesize = 512M
post_max_size = 512M
Restart PHP-FPM or Apache after making changes.
Method 4: Nginx client_max_body_size
If you are on Nginx, you also need to set the body size limit in your Nginx configuration:
client_max_body_size 512M;
Restart Nginx after saving.
Method 5: Use FTP upload instead. If you cannot change server limits (common on some shared hosts), upload the .wpress backup file directly to wp-content/ai1wm-backups/ via FTP. Then go to the All-in-One WP Migration restore page in your WordPress admin, and the backup will appear in the list ready to import.
9. Internal Server Error (500)
What you see: A generic “500 Internal Server Error” page. No specific error message is displayed.
Why it happens: A 500 error is a catch-all response from the web server. After migration, common causes include a corrupted .htaccess file, PHP memory exhaustion, a plugin or theme fatal error, or incorrect file permissions.
How to fix it:
Step 1: Check the error log. The server error log contains the actual error. On most hosts, this is at /var/log/apache2/error.log or /var/log/nginx/error.log. On shared hosting, check your control panel for error logs. The log will tell you exactly what is failing.
Step 2: Reset .htaccess. Rename .htaccess to .htaccess-backup via FTP. If the site loads, your .htaccess file was the problem. Go to Settings > Permalinks and click Save Changes to regenerate a clean one.
Step 3: Increase memory limit. Add this to wp-config.php:
define('WP_MEMORY_LIMIT', '256M');
Step 4: Deactivate plugins and theme. Follow the same process as Error #1: rename the plugins folder, then rename the active theme folder. This isolates whether a plugin or theme is causing the crash.
Step 5: Re-upload WordPress core files. If none of the above work, your WordPress core files may be corrupted from the transfer. Download a fresh copy of WordPress from wordpress.org, extract it, and upload the wp-admin and wp-includes folders to your server, overwriting the existing ones. Do not overwrite wp-content as that contains your themes, plugins, and uploads.
10. Site Painfully Slow After Migration
What you see: The site loads but takes 10, 20, or even 30 seconds per page. Everything worked fine on the old host.
Why it happens: Performance differences between hosts are common. The new server may have less CPU, less RAM, or slower storage. But more often, the slowness is caused by configuration issues that are specific to the migration.
How to fix it:
Step 1: Clear all caches. If you were using a caching plugin on your old server, the cached data may be invalid or corrupted. Delete the contents of wp-content/cache/ and wp-content/advanced-cache.php if it exists. If your caching plugin has a “purge all” option, use it.
Also check for an object-cache.php drop-in at wp-content/object-cache.php. If your old host used Redis or Memcached and your new host does not have those services, this file will cause every page load to hang while trying to connect to a non-existent cache server. Delete it.
Step 2: Check PHP version. Run php -v on your new server. If the old server was on PHP 8.x and the new one is on PHP 7.x, you will see a significant performance difference. Upgrade PHP through your hosting control panel.
Step 3: Check for hardcoded old URLs. If your old domain is different from the new one and you did not complete a full search-replace, every page may be making requests to the old server for resources. Open your browser’s developer tools (F12), go to the Network tab, and look for requests going to the old domain.
Step 4: Check the database. A bloated database will slow down everything. Clean up post revisions, spam comments, expired transients, and orphaned metadata:
wp transient delete --expired
wp db query "DELETE FROM wp_options WHERE option_name LIKE '%_transient_%'"
wp db optimize
Step 5: Check DNS resolution. If your site makes API calls to external services (or even to itself for cron), and DNS has not fully propagated, these calls may time out. Check if wp-cron.php or admin-ajax requests are slow by monitoring the Network tab.
11. File Permission Errors
What you see: Errors like “Could not create directory,” “Unable to write to file,” plugin installation failures, or media uploads failing with “The uploaded file could not be moved.”
Why it happens: When files are transferred to a new server via FTP, backup restore, or rsync, the ownership and permissions may not be preserved. The web server process needs read and write access to certain directories.
How to fix it:
Step 1: Set correct permissions. The standard WordPress permission scheme is:
- Directories:
755(owner can read/write/execute, everyone else can read/execute) - Files:
644(owner can read/write, everyone else can read only) wp-config.php:640or600(restricted for security)
Apply these recursively:
find /path/to/wordpress -type d -exec chmod 755 {} \;
find /path/to/wordpress -type f -exec chmod 644 {} \;
chmod 640 wp-config.php
Step 2: Fix ownership. The files must be owned by the web server user. On most servers, this is www-data (Debian/Ubuntu) or apache (CentOS/RHEL):
chown -R www-data:www-data /path/to/wordpress
Check your server’s web user with:
ps aux | grep -E 'apache|nginx|httpd' | head -5
Step 3: Check wp-content/uploads specifically. This directory needs to be writable for media uploads. If only uploads are failing, set this directory to 755 and ensure it is owned by the web server user.
12. Serialized Data Corruption
What you see: Theme settings are wrong or reset. Widgets are missing or broken. Plugin options are reverted to defaults. Menus are partially working. The site looks completely different from the original even though the database was imported.
Why it happens: WordPress stores many settings as serialized PHP data in the database. Serialized strings include character counts. For example:
s:25:"https://oldsite.com/logo";
The s:25 means the string is 25 characters long. If you run a raw SQL REPLACE to change oldsite.com to newsite.com (one character longer), the string becomes 26 characters but the count still says 25. PHP cannot unserialize the data, so WordPress discards it and uses defaults.
How to fix it:
Step 1: Never use raw SQL for URL replacement. Avoid queries like:
-- DO NOT USE THIS for URL migration
UPDATE wp_options SET option_value = REPLACE(option_value, 'oldsite.com', 'newsite.com');
Step 2: Use tools that handle serialization. WP-CLI’s search-replace command is serialization-aware. It adjusts the character counts automatically:
wp search-replace 'https://oldsite.com' 'https://newsite.com' --skip-columns=guid
The All-in-One WP Migration plugin handles serialized data replacement automatically during import. This is one of the key advantages of using a dedicated migration tool rather than manual database manipulation.
Step 3: If damage is already done. If you already ran a raw SQL replace and your serialized data is corrupted, restoring from backup is the cleanest path. If no backup is available, you will need to manually reconfigure your theme settings, widgets, and plugin options.
13. Emails Not Sending After Migration
What you see: Contact form submissions do not arrive. Password reset emails never come through. WooCommerce order confirmations are missing. No email leaves the site.
Why it happens: WordPress uses PHP’s mail() function by default, which relies on the server’s local mail service. Your new host may not have a mail service configured, may block outgoing mail to prevent spam, or may have different SMTP settings. Additionally, if you changed domains, your old SPF and DKIM DNS records no longer apply.
How to fix it:
Step 1: Install an SMTP plugin. Install WP Mail SMTP or a similar plugin and configure it to send mail through an external service like Gmail, SendGrid, Mailgun, or Amazon SES. This bypasses the local mail server entirely and is more reliable.
Step 2: Test email delivery. Use the WP Mail SMTP test email feature or install the “Check & Log Email” plugin to verify that emails are being sent and to see any error messages.
Step 3: Update DNS records. If you changed domains, update these DNS records for your new domain:
- SPF record: Authorizes which servers can send email for your domain
- DKIM record: Adds a cryptographic signature to prove emails are authentic
- DMARC record: Tells receiving servers how to handle emails that fail SPF or DKIM checks
Step 4: Check your host’s email policy. Some cloud providers (like AWS EC2 and Google Cloud) block port 25 by default to prevent spam. You may need to request this port to be unblocked or use an alternative SMTP port (587 or 465).
14. Scheduled Posts and Cron Jobs Not Running
What you see: Scheduled posts are not publishing on time. Automatic backups have stopped. Scheduled emails are not being sent. The Action Scheduler queue (used by WooCommerce and many plugins) is backed up with pending tasks.
Why it happens: WordPress uses a pseudo-cron system called WP-Cron that triggers on page visits. If your new site has low traffic, WP-Cron may not fire frequently enough. Additionally, if DISABLE_WP_CRON was set to true in wp-config.php on the old server (common when using a real server cron), and the new server does not have a matching cron job set up, all scheduled tasks will stop.
How to fix it:
Step 1: Check wp-config.php for DISABLE_WP_CRON. Search for:
define('DISABLE_WP_CRON', true);
If this line exists, you need to set up a real server cron job on the new host to replace it. If you do not want to set up a server cron, remove or comment out this line to re-enable WP-Cron’s default behavior.
Step 2: Set up a proper server cron. Add this to your server’s crontab (runs every 5 minutes):
crontab -e
Add the line:
*/5 * * * * curl -s https://yoursite.com/wp-cron.php > /dev/null 2>&1
Or using WP-CLI:
*/5 * * * * cd /path/to/wordpress && wp cron event run --due-now > /dev/null 2>&1
Step 3: Test WP-Cron manually. Visit https://yoursite.com/wp-cron.php in your browser. If you get a blank page, it is working. If you get an error, there may be a loopback connection issue. Some hosts block a server from making HTTP requests to itself. Ask your host to whitelist loopback requests or use the WP-CLI cron method above instead.
Step 4: Check the Action Scheduler. If you use WooCommerce or any plugin that relies on Action Scheduler, go to Tools > Scheduled Actions in the WordPress admin. If you see a large backlog of pending actions, WP-Cron is not running properly. Fix cron first, then the queue will clear itself.
15. SEO Rankings Dropped After Migration
What you see: Your Google rankings have dropped significantly. Pages that were on page 1 are now on page 3 or gone entirely. Organic traffic has fallen off a cliff.
Why it happens: Ranking drops after migration are common but usually temporary. The most common causes are: missing 301 redirects when changing domains, a robots.txt file that blocks crawling (often leftover from a staging environment), URLs that changed without proper redirects, or the XML sitemap not being updated.
How to fix it:
Step 1: Check robots.txt. Visit yoursite.com/robots.txt in your browser. Make sure it does not contain Disallow: /, which blocks all search engines. A staging site often has this rule to prevent indexing. If your migration carried it over, remove it immediately.
Step 2: Set up 301 redirects. If your domain changed, every old URL needs a 301 redirect to its new equivalent. Add redirects in .htaccess:
RewriteEngine On
RewriteCond %{HTTP_HOST} ^oldsite\.com$ [NC]
RewriteRule ^(.*)$ https://newsite.com/$1 [R=301,L]
If only specific URLs changed (for example, a permalink structure change), map each old URL to its new location:
Redirect 301 /old-page-slug https://yoursite.com/new-page-slug
Step 3: Submit an updated sitemap. Generate a new XML sitemap (Yoast SEO, Rank Math, or any sitemap plugin) and submit it through Google Search Console. Go to Sitemaps in the left sidebar, enter the URL of your new sitemap, and click Submit.
Step 4: Use Google Search Console’s Change of Address tool. If you moved to a new domain, go to Google Search Console, select your old property, then go to Settings > Change of address. Follow the steps to notify Google that your site has moved.
Step 5: Check for noindex tags. Some migration tools or staging environments add <meta name="robots" content="noindex"> to pages. Check your site’s source code for this tag. Also check Settings > Reading in WordPress for the “Discourage search engines from indexing this site” checkbox. Make sure it is unchecked.
Step 6: Be patient. Even with everything done correctly, Google may take 4 to 12 weeks to fully reprocess a domain migration. Monitor your rankings in Google Search Console and address any crawl errors that appear.
For a complete pre-migration and post-migration SEO process, see our WordPress SEO migration checklist, which covers all six migration scenarios ranked by SEO risk.
Quick Reference: Migration Error Diagnostic Table
| Symptom | Most Likely Cause | First Fix to Try |
|---|---|---|
| Blank white screen | PHP fatal error | Enable WP_DEBUG and check debug.log |
| “Error establishing database connection” | Wrong credentials in wp-config.php | Verify DB_NAME, DB_USER, DB_PASSWORD, DB_HOST |
| 404 on all pages except homepage | Missing .htaccess rewrite rules | Resave permalinks in Settings |
| Broken images | Old URLs in database | Run wp search-replace with old and new domains |
| “Not Secure” browser warning | HTTP URLs in database | Search-replace http:// to https:// |
| Login loop | Mismatched site URL or stale cookies | Clear cookies and verify siteurl/home options |
| Import stuck | PHP execution time or memory limit | Increase max_execution_time and memory_limit |
| Upload size exceeded | PHP upload_max_filesize too low | Increase limit in .htaccess, .user.ini, or php.ini |
| 500 Internal Server Error | Corrupted .htaccess or PHP crash | Rename .htaccess and check error log |
| Extremely slow site | Stale cache or missing object cache server | Delete object-cache.php and clear wp-content/cache/ |
| “Could not create directory” | Wrong file permissions | Set dirs to 755, files to 644, correct ownership |
| Theme settings reset | Serialized data broken by raw SQL replace | Restore backup and use WP-CLI search-replace |
| No emails sending | Server mail blocked or not configured | Install WP Mail SMTP plugin |
| Scheduled posts not publishing | DISABLE_WP_CRON without server cron | Remove the constant or set up a real cron job |
| SEO rankings dropped | Missing 301 redirects or robots.txt blocking | Check robots.txt and set up redirects |
After the Errors: Plugin Reconfiguration
Once you have resolved any migration errors and your site is loading correctly, there is one more step most people overlook. Many WordPress plugins store server-specific settings, API keys, or environment-dependent configurations that do not transfer cleanly between hosts. Caching plugins, SMTP mailers, security firewalls, and backup tools almost always need manual reconfiguration after a move. See our guide to plugins that need reconfiguration after WordPress migration for the full list and what to check for each one.
Prevention: How to Avoid These Errors
Most migration errors are preventable with the right preparation:
Always create a full backup before migrating. Files and database. If something breaks, you can restore and try again.
Use a migration plugin that handles serialized data. Tools like All-in-One WP Migration automatically handle URL replacement, serialized data, and file transfers in one step. This eliminates the most common migration errors (broken images, corrupted settings, URL mismatches) before they happen.
Test on a staging site first. Import your backup to a staging URL before pointing your real domain. This lets you catch and fix problems without affecting your live site.
Document your old server configuration. Note the PHP version, MySQL version, memory limits, and any custom
.htaccessrules before migrating. This makes it easier to match the configuration on the new server.Lower your DNS TTL before migrating. Change your DNS Time-to-Live to 300 seconds (5 minutes) at least 48 hours before migration. This ensures that when you update DNS to point to the new server, the change propagates quickly.
Keep the old server running for at least a week. Do not cancel your old hosting immediately. Keep it active so you can compare configurations, check for missed files, and serve as a fallback if something goes wrong.
FAQ
How long should a WordPress migration take?
A small WordPress site (under 1 GB) can be migrated in under 30 minutes with a plugin like All-in-One WP Migration. Larger sites with extensive media libraries may take 1 to 3 hours. The actual file transfer is usually the longest part. Allow additional time for DNS propagation (up to 48 hours, though it is usually much faster) and post-migration testing.
Can I migrate WordPress without any downtime?
Yes. The standard approach is to set up the site on the new server while the old server is still active, test everything on the new server using a temporary URL or hosts file entry, then update DNS to point to the new server. Visitors continue seeing the old server until DNS propagates, at which point they seamlessly start hitting the new server.
Will I lose my SEO rankings if I migrate to a new host?
If you keep the same domain name and URLs, a host-to-host migration should not affect your rankings at all. The issues arise when you change domains or URL structures without proper 301 redirects. See Error #15 above for the full checklist.
What is the safest way to migrate a WordPress site?
The safest approach is to use a dedicated migration plugin like All-in-One WP Migration that handles the entire process (files, database, URL replacement, serialized data) in one step. This eliminates the most error-prone parts of manual migration: partial file transfers, forgotten database tables, and serialized data corruption from raw SQL queries.
I followed all the steps but my site is still broken. What now?
If none of the fixes in this guide resolve your issue, restore from your pre-migration backup and start over. Migration is much easier the second time because you already know the pitfalls. Make sure to match your old server’s PHP version and configuration as closely as possible on the new server before re-attempting the migration.
Need a migration walkthrough? Check out our complete guide to migrating WordPress to a new host, our step-by-step guide for migrating a WooCommerce store, our WordPress multisite migration guide, our guide to plugins that need reconfiguration after migration, or the original quick migration walkthrough.
Want to verify everything moved correctly? Our post-migration verification checklist covers 50+ checks across 10 categories to confirm your site is fully functional after migration.