
How to Use the WordPress Site Editor to Create a Professional Website
If you’re looking to create a professional website quickly and easily, look no further than the WordPress Site Editor. This powerful tool allows you to design and customize your website with ease, even if you have no coding experience. In this article, we’ll walk you through all the steps needed to use the WordPress Site Editor to create a website that will make a strong impression on your users.
Understanding the WordPress Site Editor
Are you looking for a tool that can help you create and customize your website without any coding experience? Look no further than the WordPress Site Editor! This feature-packed visual editing tool is perfect for beginners and experts alike.
What is the WordPress Site Editor?
The WordPress Site Editor is a powerful tool that allows you to create dynamic, responsive pages with ease. Whether you’re looking to add images and videos, incorporate text, or create forms, the Site Editor has got you covered. With its user-friendly interface, you don’t need any coding knowledge to get started.
But that’s not all! The WordPress Site Editor also comes with a wide range of customizable templates and themes to choose from. So, whether you’re looking for a sleek and modern design or something more traditional, you can easily find a template that suits your needs.
Key Features of the WordPress Site Editor
Let’s take a closer look at some of the standout features of the WordPress Site Editor:
- User-Friendly Interface: The Site Editor is designed to be easy to use, even if you have no coding experience. Its intuitive interface makes it simple to create and customize your website.
- Customizable Templates and Themes: With a wide range of templates and themes to choose from, you can easily find a design that fits your brand and style.
- Built-In SEO Optimization: The Site Editor comes with built-in SEO optimization tools to help you rank higher on search engines. This means more traffic and more potential customers for your website.
- Integration with Popular Plugins: The Site Editor integrates seamlessly with popular plugins like WooCommerce and Yoast SEO. This means you can easily add e-commerce functionality or improve your SEO without any extra hassle.
Overall, the WordPress Site Editor is a must-have tool for anyone looking to create a professional, dynamic website without any coding experience. So why wait? Start using the Site Editor today and take your website to the next level!
Setting Up Your WordPress Website
Starting a website can be a daunting task, but with WordPress, it’s easier than ever before. WordPress is a powerful platform that allows you to create a professional-looking website without any coding skills. In this guide, we’ll walk you through the process of setting up your WordPress website.
Choosing a Domain Name and Hosting
The first step in setting up your WordPress website is choosing a domain name and hosting. Your domain name is your website’s address, and your hosting is the place where your website’s files are stored. When choosing a domain name, make sure it’s memorable and unique. You can use a domain name registrar like GoDaddy or Namecheap to purchase your domain name.
When it comes to hosting, there are many options available. Some popular hosting providers include Bluehost, HostGator, and SiteGround. Consider your website’s needs when selecting a hosting provider. If you’re just starting out, shared hosting may be a good option for you. If you’re expecting a lot of traffic, you may need a dedicated server.
Installing WordPress
Once you have your domain and hosting account set up, you can install WordPress. Most hosting providers offer a one-click installation process that will have WordPress up and running in minutes. If your hosting provider doesn’t offer a one-click installation, you can download WordPress from the official website and install it manually.
After installing WordPress, you’ll need to log in to your dashboard. This is where you’ll manage your website’s content, design, and functionality. The WordPress dashboard is user-friendly and intuitive, so you don’t need any coding skills to get started.
Selecting a Theme
With WordPress installed, it’s time to select a theme for your website. The WordPress Site Editor offers a wide range of customizable templates that you can use to create your website’s design. Choose a theme that complements your brand and offers the features you need for your site.
When selecting a theme, consider your website’s purpose. If you’re creating a blog, you may want a theme that emphasizes your content. If you’re creating an online store, you may want a theme that showcases your products. You can also customize your theme’s colors, fonts, and layout to make it unique to your brand.
Overall, setting up your WordPress website is a straightforward process that anyone can do. With the right domain name, hosting, and theme, you can create a professional-looking website that will help you achieve your online goals.
Navigating the WordPress Site Editor Interface
Are you new to WordPress? Do you find the WordPress Site Editor interface overwhelming? Fear not! In this article, we will guide you through the basics of navigating the WordPress Site Editor interface.
The Editing Toolbar
The editing toolbar is a mainstay of the WordPress Site Editor interface. It is located at the top of the editing screen and is always visible. This toolbar allows you to easily add different types of blocks to your pages, including text, images, buttons, videos, and more. You can select and edit blocks using the toolbar, and you can also customize the layout and style of your website.
One of the most useful features of the editing toolbar is the ability to add new blocks to your page. To do this, simply click on the plus (+) icon in the top left corner of the toolbar. This will open up the block library, where you can choose from a wide range of pre-designed blocks.
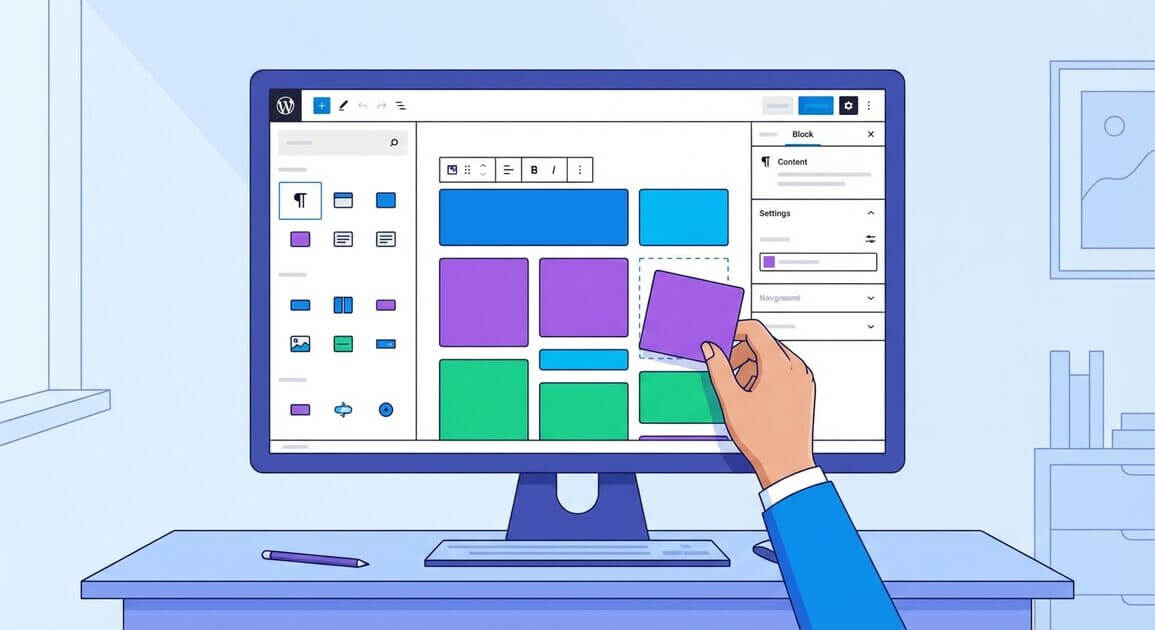
The Block Library
The block library is an extensive collection of pre-designed blocks that you can use to quickly create complex layouts without any coding experience. Simply select the block you want to add to your template and customize it as needed. The block library is organized into different categories, such as Common Blocks, Formatting, Layout Elements, and Widgets. This makes it easy to find the block you need.
Some of the most popular blocks in the block library include the Image block, the Video block, the Button block, and the Paragraph block. You can also find more specialized blocks, such as the Table block, the Audio block, and the Gallery block. With so many options to choose from, you can easily create a unique and engaging website.
The Settings Sidebar
The settings sidebar is located on the right-hand side of the editing screen. It allows you to customize the page settings for your template, including the page title, meta description, and more. You can also select which page elements will display, such as a header or footer.
One of the most useful features of the settings sidebar is the ability to preview your page. This allows you to see how your page will look before you publish it. You can also save your changes as a draft, so you can come back to them later.
In conclusion, the WordPress Site Editor interface may seem overwhelming at first, but with a little practice, you will soon become a pro. By using the editing toolbar, the block library, and the settings sidebar, you can easily create a unique and engaging website. So what are you waiting for? Start exploring the WordPress Site Editor interface today!
Creating and Customizing Pages
Creating pages on your WordPress website is an essential part of building your online presence. Pages are where you can showcase your products, services, or ideas to your audience. In this guide, we’ll take a closer look at how to add new pages and customize page layouts using the WordPress Site Editor.
Adding a New Page
Adding a new page to your WordPress website is a simple process. Once you’re logged into your WordPress dashboard, click on “Add New” to create a new page. You’ll be taken to the Site Editor, where you can start building your page using a range of different blocks.
Before you start creating your page, it’s a good idea to think about what you want to include on your page. What is the purpose of the page? What information do you want to convey to your audience? By having a clear idea of what you want to achieve with your page, you’ll be able to create a more effective and engaging page.
Customizing Page Layouts
The WordPress Site Editor makes it easy to customize your page layout. You can choose from a range of different block types, including text blocks, image blocks, video blocks, and more. Once you’ve added your blocks to your page, you can drag and drop them into the layout you need.
Customizing the design and layout of your page is an important part of creating a professional-looking website. You can use the Site Editor to change the font, color, and size of your text, add background images, and much more. By taking the time to customize your page, you’ll be able to create a unique and engaging website that stands out from the crowd.
Working with Blocks
The WordPress Site Editor blocks offer a great deal of flexibility, allowing you to customize your page and add interest to your content. You can use blocks to add content, embed social media feeds, add forms, and much more.
One of the great things about working with blocks is that they’re easy to use. You don’t need to have any coding knowledge to create a professional-looking page. Simply drag and drop the blocks you need, and customize them to suit your needs.
Overall, the WordPress Site Editor is a powerful tool that can help you create a professional-looking website with ease. By following the steps outlined in this guide, you’ll be able to create engaging and effective pages that will help you achieve your online goals.
Conclusion
The WordPress Site Editor is a powerful tool that allows you to easily create a professional-looking website without any coding experience. With a range of templates, customizable blocks, and user-friendly features, you can create dynamic, responsive pages with ease, making it the perfect choice for businesses, freelancers, and site owners who want to create a strong online presence without any hassle.